Supplies needed:
Screen frame, Printer, Modge Podge glue, Small paint brush, Painter's tape, Fabric paint
I've been teaching myself how to make screens for printing. I bought simple curtain fabric for $3.99/yd and some "build-your-own" frames. I glued the frames together with wood glue, and after they dried I stapled the curtain fabric around the frame. Once I had the screen frame, I was ready to get started.
Using Photoshop, I created the quote and enlarged it to fit an 8x10 paper and printed it out.

Once I have the printed image, I traced it with a pencil onto the screen. Be sure to trace the image with the screen flat on the image. This is the same direction you will be printing from once the screen is ready, so it's a direct-image transfer (no need to reverse the image).

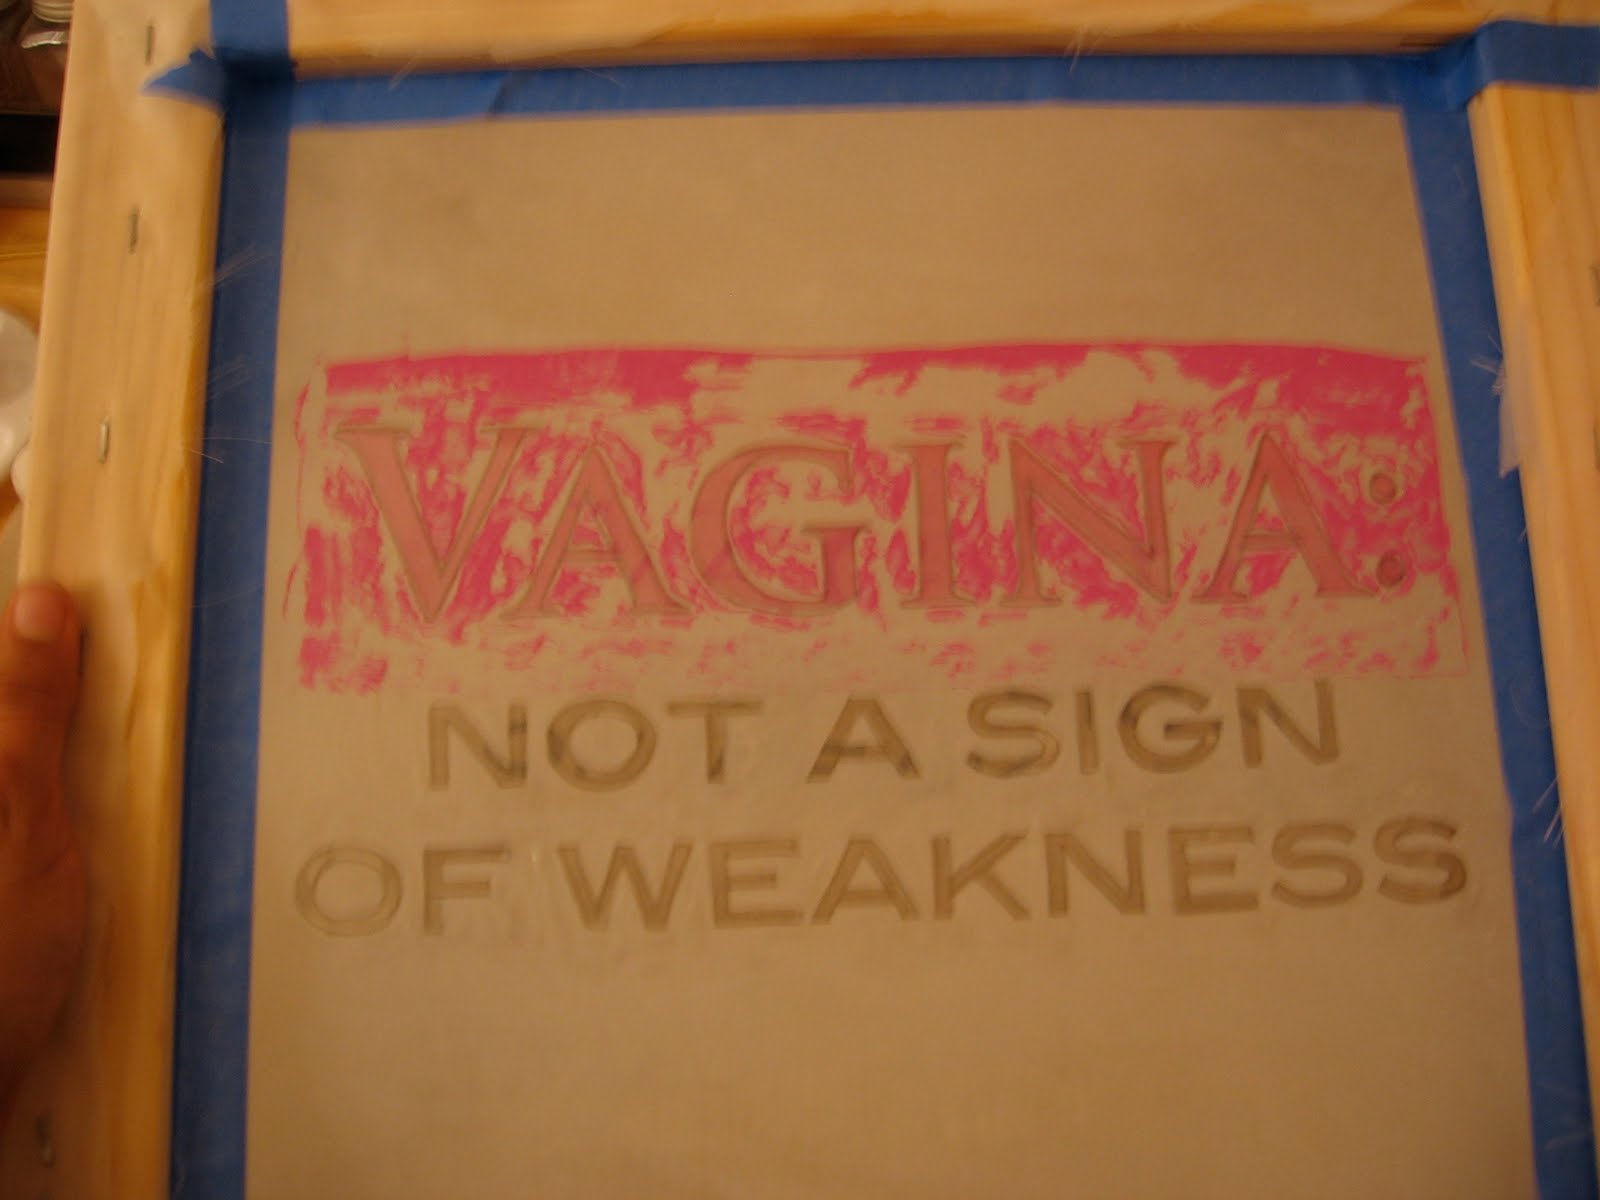
The next step was to make the screen by filling in the space around the printed image using Modge Podge. This means tracing around the letters with the MP so that only the image that will be printed is left. This can be a time-consuimg process, but if you use a small brush around the image first, then fill in the larger space it's a bit easier.

The screen must dry before you can print with it. If it's in the sun, the screen can dry within 4 hours. Once the screen is dry, use painters tape to tape off the sides of the screen. This will prevent any paint from getting past the border of Modge Podge.

Now the screen is ready to use! I wanted the word Vagina to be screened in pink, with the other words in black. In order to do this, I taped off the words, squeezed some fabric paint on the side of the letters and dragged the fabric paint across the letters. Once with pink, and once with black. This can be done easily, but be careful not to overlap colors.

So this was the result of the screen. Then I got all the parts together to make the pillow. I decided to add some fabric hearts to 'soften' the message.


Once I added my tag to the back of the pillow, it was ready to go. Here's the final product:


You can find this pillow on my Etsy page:
*peace
n
No comments:
Post a Comment